
How to Record Screen Activity in Windows: A Comprehensive Guide
If you're looking to create tutorials, demonstrations, how-to videos, or online classes, recording your screen activity on Windows is an essential tool. Thankfully, Windows offers built-in utilities that make capturing your screen easy and efficient without needing third-party software. This guide will cover two primary methods: using the Game Bar available in Windows 10 and 11, and the Snipping Tool feature in Windows 11. We will also explore customization options to ensure your recordings meet your needs.
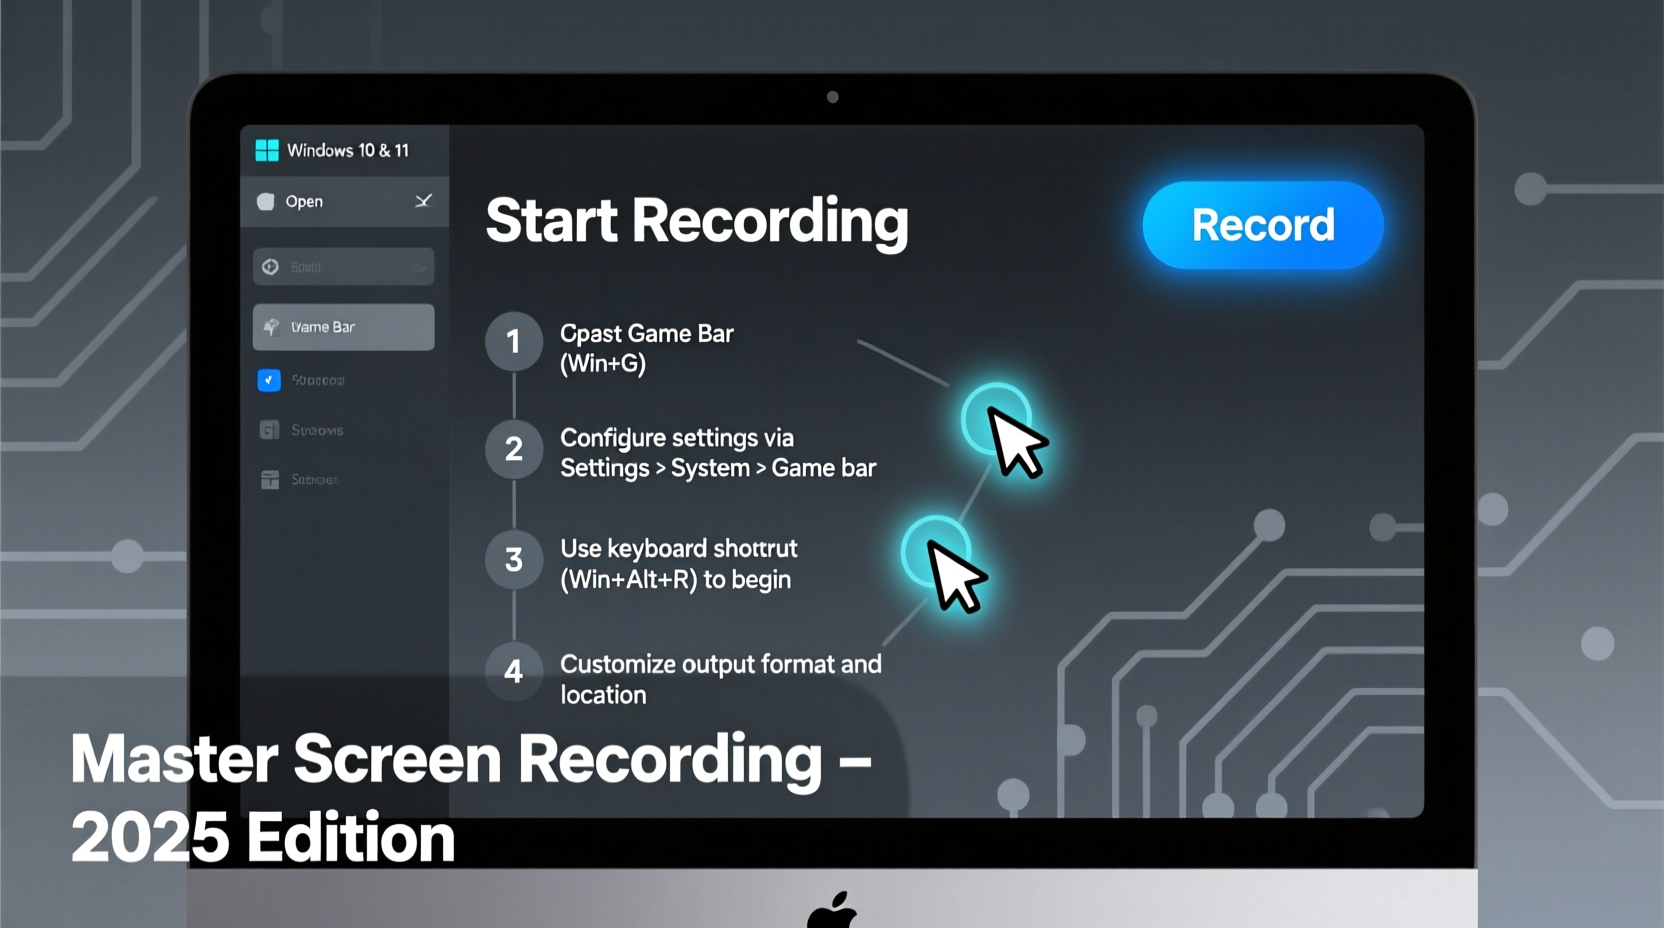
Method 1: Using Windows Game Bar to Record Screen Activity
The Game Bar, included in both Windows 10 and 11, is designed primarily for recording gameplay but is versatile enough to capture any on-screen activity. Here's how you can utilize the Game Bar:
Step-by-Step Guide to Using Game Bar
1. Access Game Settings
Navigate to Settings > Gaming > Captures in Windows 10 or 11. You will notice differences in screen layout between the versions, but the fundamental options remain the same. By default, recordings are saved in Videos\Captures, which can be changed via File Explorer if desired.
2. Enable Background Recording
Windows 10 users should turn on "Record in the background while I’m playing a game". For Windows 11, enable "Record what happened". You can select the duration of background recording from 15 seconds up to 10 minutes and can enable recording even without power or when projecting wirelessly.
3. Configure Recording Length
Set the maximum recording length from 30 minutes to 4 hours using the dropdown menu for "Max recording length".
4. Audio Settings
Enable the switch for capturing audio and adjust the quality, microphone volume, and system audio volume to your preference in both versions. Windows 10 has the option "Record audio when I record a game", while Windows 11 features "Capture audio when recording a game".
5. Adjust Frame Rate and Cursor Capture
The recommended frame rate is 30 fps but can be increased to 60 fps if necessary. Set the video quality to standard or high and choose whether to capture the mouse cursor.
6. Keyboard Shortcuts
Customize keyboard shortcuts via Settings in Windows 10 or within the Game Bar interface in Windows 11. Notable shortcuts include:
- Windows key+G: Open Game Bar
- Windows key+Alt+R: Start/Stop recording
- Windows key+Alt+G: Record the last 30 seconds
- Windows key+Alt+PrtScn: Take a screenshot
Recording with Game Bar
1. Prepare for Recording
Set up the activity you wish to record and press Windows key+G to display the Game Bar.
2. Start Recording
Click the Record button in the Capture pane and perform the screen activities you need to capture. A small recording panel will appear on the screen.
3. Stop and Review Recording
Press the stop button on the recording panel once done. A notification will appear indicating the clip was recorded, and you can view it in the Gallery window of the Game Bar.
4. Record Without Opening Game Bar
Use Windows key+Alt+R for instant recording. To capture the last 30 seconds, press Windows key+Alt+G.
5. Access and Edit Your Recordings
Navigate to c:\users\[username]\Videos\Captures to find your recordings saved as MP4 files, ready for editing.
6. Modify Game Bar Settings
Access settings by pressing Windows key+G and selecting the Settings icon on the top toolbar. Adjust shortcuts, visual themes, transparency, and audio settings as needed.
Method 2: Using Snipping Tool in Windows 11
Windows 11 enhances the traditional Snipping Tool, allowing for screen recording in addition to static screenshots. Here’s how to use it:
Step-by-Step Guide to Using Snipping Tool
1. Verify OS Version
Ensure your build is 22621.1344 or higher by checking Settings > System > About. Update your OS and Microsoft Store apps if necessary.
2. Open Snipping Tool
Start the Snipping Tool from the Start menu, select Camera icon, and click New.
3. Select Recording Area
Choose the area you intend to record and click Start on the toolbar.
4. Capture Screen Activity
Perform desired screen activities. Pause and resume recording as needed, and click Stop when finished.
5. Edit and Save Recording
Preview the recording and opt to edit in Clipchamp, save as an MP4 file, or share it directly via the Snipping Tool.
6. Configure Audio Settings
Before recording, open Snipping Tool settings, scroll to Screen recording, and enable microphone and system audio input.
| Feature | Game Bar | Snipping Tool |
|---|---|---|
| Availability | Windows 10 & 11 | Windows 11 |
| Primary Use | Gameplay Recording | Screen Recording & Screenshots |
| Customization Options | Extensive | Basic |
| Audio Capture | Yes | Yes |
| Keyboard Shortcuts | Configurable | No |
| Editing Capabilities | Requires External Editor | Integrated with Clipchamp |
Whether using the comprehensive Game Bar or the newly enhanced Snipping Tool in Windows 11, you have robust tools at your disposal for capturing screen activity. Customize your settings to get the best results for your specific needs and elevate the quality of your presentations, tutorials, or online videos.


 浙公网安备
33010002000092号
浙公网安备
33010002000092号 浙B2-20120091-4